Showing posts with label Garland. Show all posts

Sunday, February 3, 2013

Lepper Colony Etsy Shop

It is official - I am a shop!

I opened my Etsy shop last week and it has been going so well - I made 3 sales within my first few days!

I currently only have a few things on my site but I am bound and determined to fill it up with awesomeness as soon as I can.

I pinky-promise that I will not incessantly post updates on my shop or its contents but I couldn't help but announce it's birthday.

Feel free to stop by... here is the address: Lepper Colony Etsy Shop

And... here are a few items currently in there. More to come... Promise. I love holidays so there will always be holiday goodies available!


Thanks for stopping by!!

Wednesday, January 9, 2013

Happy New Year!

I'm a bit late, but sincere none-the-less. Happy New Year!!

I've been seeing a lot of bloggers posting about their new year's resolutions so I figured, why not jump on the bandwagon?

Typically, every year I make a laundry list of things I want to accomplish in the new year. Last year's list was fairly attainable.. or so I thought. When I recently re-read it, I laughed & realized I had completed or achieved about 1/4 of the list. Even easy things like "read 3 books" was only met by 1/3 completion. Eek! So this year, I'm keeping the list short and simple.

Read More

Family Art Night 

Make Date Nights truly dates

Open Etsy Shop

Cook New Things

Drink more water

Silly... probably. Doable... yes!


Read More
I used to be quite the avid reader before my little sprout was born. I read tons of fiction and even some non-fiction (especially when we decided to start our family). I read one book this year for fun and realized how much I had missed it. I found myself easily blowing off TV to go read.

A few things I have on my list...

Photo Credits: Amazon.com
Does anyone have any good suggestions for books? Chances are I have not read it!


Family Art Night
When I was pregnant with Drew I was already planning family traditions in my head. I am a huge sucker for traditions and wanted to start them as soon as possible. I think they are important for kids while they grow up to have fun things that they can look forward to. Family Art Night will be once a month (to start) and will just be a fun night of some new art or craft activity that all of us do together. Our first project will be some Valentine's Day cards to send out to our family.

Photo Credit: Miscellaneous Pinterest

Date Nights
My mother-in-law has graciously come over one night every week since Drew was born and allowed me and Mark the opportunity to spend some time, just the two of us. For a while we were making efforts about going fun places but then it kind of turned into errand running or just staying home. Mark and I agreed that we should turn these nights back into "dates." I don't think we'll go as far to get dressed up or anything (maybe every so often) but definitely put the effort back into these special nights.

Just a picture of me and Mark... a very old picture.. Look how young I am! 


Etsy Shop
I mentioned in a previous post that I was working on a Etsy shop. I am still hoping to be able to get some inventory in stock soon so I can launch away.

Banners, Buntings and Garlands, oh my!

Cook New Things
What are we serving? Chicken or Chicken?

This wasn't on my original list but after reading the 7-day Challenge over at Dinner: A Love Story I decided to join in the fun & add some new recipes into our dinner repertoire. This week I already have 3 new things on the menu!

Photo Credits: Dinner: A Love Story, Skinny Taste


Drink More Water
This one is fairly self-explanatory. When we were training for our Ragnar races it was always super important that we hydrated before the race and, even though it made me have to use the facilities every 30 minutes, I always felt so much better when my body was fully hydrated. My company moved into a new office this January and it has a filtered water & ice machine and I am super excited about the ice. Is that silly? Yes... but it makes me want to drink water so it's cool.

 I wish everyone a very Happy, Healthy & Blessed 2013!


Amy

Tuesday, December 11, 2012

Fun New Project

I bet everyone is wondering what I'm up to these days... where have I been? what am I doing? 
Actually.. I am working on something big. Well, big for me, at least. 

I am opening an Etsy store. Yay!

After my post about my festive birthday garland, I got so much positive feedback on it that I decided that I would make and sell different fun garlands, banners, buntings, etc. I've been a busy bee trying to work on some items so sell in my new store so that is why my blog posts have been so sparse lately. That and it's the holidays... work is crazy... I have a 2 year old... etc.  (is "etc" even needed?! Aren't the first 3 things enough?) So definitely look for that, coming in January.

Something I do want to share with you is my new Lepper Colony logo that my very talented husband made for me. 


Isn't it awesome?! I heart it so much.

So now that I've told you all about this festive new venture, I have to get working as not to disappoint all my adoring fans. All 8 of you. (For all of whom, I am very grateful!)

And maybe I can get my buns in gear and actually post some holiday posts. I've been working on some tasty treats that I want to share. I'll be back with those - pinky-promise. 

Happy Holidays!

Wednesday, October 3, 2012

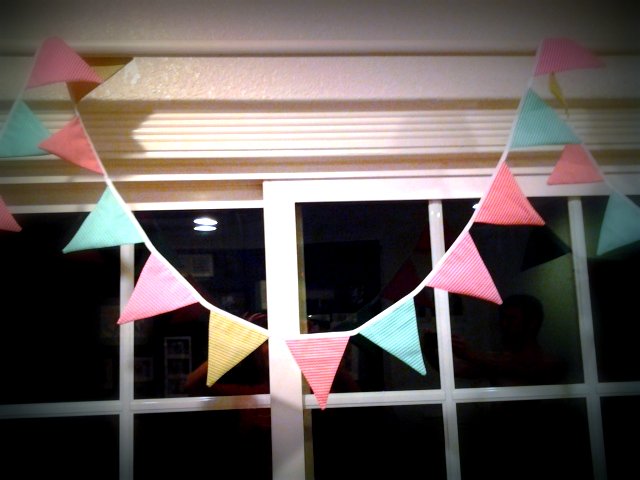
DIY: Festive Birthday Garland

Yes, it's true... on top of baking and cooking... I love to DIY and be all crafty. And now, I am going to share it with you! You lucky dogs!

My birthday was last week and, whereas, my wonderful husband is great and talented at lots of things, creating birthday decorations may not be one of them. So, instead of waiting to find out, I decided to make my own birthday garland to hang up in the living room.
Yay! Cute and festive!

Confession: I love Joann Fabric
I could happily browse the aisles for hours and be happy as a clam. 
The day I went to pick out fabric for my banner all of the fat squares were $1!! Can you believe it?! What luck! So I picked out 4 different patterns for my birthday garland and 5 different patterns for my fall garland (that has yet to be worked on.. sigh). 

This project is actually fairly easy but is not a quick project. I cut all my triangles on one day and then attacked the sewing another. My blocks of time are not always consistent so I take it as it comes. 


FESTIVE TRIANGLE FLAG GARLAND

 As I mentioned previously, the first step is cutting out all your triangles. I just made a triangle shape that I liked out of some cardboard laying around and then marked and cut all my triangles. Don't forget to cut a front &  back for each triangle. 

I cut about 5-6 of each pattern.

 You will edge-stitch down the two long sides of each triangle. I would keep your stitch length pretty short to avoid any side blow-outs. (Or worse - point blow-out!)

I sewed down one side & with the needle down, rotated the triangle to sew back up the other side. I like doing this better than having to lift the needle and reposition the triangle. 
Working smarter, not harder, since 1985. 

 Snip the tip off of your triangle to help cut down on the bulk inside your flag once you flip it right-side-out. Be careful not to cut the stitching!

Turn your triangle right-side-out and with a pen (or similar) push the triangle tip down so all the fabric is flat.

 All my triangles are ready to be pressed!

 Pressing the triangles will definitely help with sewing them. This fabric is 100% cotton so it gets nice and crisp when you press it. This definitely helps when sewing them to the tape. 

  Layout your triangles by color & then you can easily put them in order for sewing. I find it super helpful to have all my triangles in the sewing order before I start sewing. Then you can just grab from the top of the pile without having to worry that you just sewed 2 of the same color in a row. Eek! 

I used 1/4" double-fold bias tape to make the garland. I think 3/8" or 1/2" might be easier (gives you a bit more room at the top to tuck the triangle in) but I went with 1/4" for this project. I liked the "dainty" size of it. For bigger triangles - definitely use a wider tape.

For the first triangle, I found it necessary to pin it in place to start sewing. Leave about 3-4 inches of the tape at the end (for the hanger loop) and then pin the top raw edge into the tape, sandwiching it between the top/bottom. The tape's fold should be facing up. 

 Using a short stitch-length (or SPI for the sewing savvy), edge stitch as close to the bottom side of the taping as possible. Edge-stitching will ensure you catch the whole length of the triangle in the taping. Once you have reached the end of the triangle, continue to sew for about 1/4" then, with the needle down, lift the foot and add your next triangle, sandwiching it in the tape. Put the foot back down and continue sewing until all your triangles are used or until you run out of taping. If it is the latter, be sure to save about 4" at the end of the taping for the hanger loop.

 To create the hanger loop, simply turn back the ends of each side and tack (tack &  back-tack about 3-4 times to ensure stability). 

And there you have it - your very own festive triangle garland!

 It just screams "Happy Birthday," doesn't it?


In case you're wondering, I had a nice birthday. Weekday birthdays are always a bit more subdued but for a Thursday, it was perfect. 

Happy Crafting!

PS: have I mentioned my complete adoration for Martha Stewart?