Friday, August 17, 2012

Project Brownies: Nutella

I decided to run a social experiment using brownies. My undergrad degree is in Sociology and are few things I like more than doing social experiments. Ok, that's not true... but they are fun! And what makes them more fun? Brownies, of course!


I will admit for this project I went with box brownies... I am a die-hard "from scratch" kind of person but since the focus of this project wasn't so much the brownie base but the end result I decided to save myself the hassle and just go with a box mix. Don't tell anyone.


Gathering all of the complex ingredients: Mix, Eggs (in one of my new cute bowls!), Water, Vegetable Oil

And today's guest ingredient: Nutella 


Basically I made the brownies as the box directed and before I popped them in the oven, I swirled some Nutella onto the top. 


This is the end result - super delish, hazelnutty brownies. 
And easy-peasy. 

If you're wondering why I am doing this experiment it is because I am curious about a few things: 
1) If people really like brownies with stuff in them - or are most people more prone to like just plain brownies?
2) If they do like additions, what level of additions to they like - this is why this is a 3-part project
3) How many brownies can the people in my office eat before they get sick of them? Just kidding. That could never happen. Who gets sick of brownies?!

Since you're dying to know, the reaction to these brownies was fairly good. People liked the subtle hint of hazelnut that the Nutella added. A few people thought they were really sweet, which they were, but still managed to force them down (wink, wink) so I think they must have been ok. 

Cheers to the Cook!


Nutella Brownies

1 box of brownie mix (I used Betty Crocker)

Ingredients for this mix:
2 eggs
1/4 cup water
2/3 cup vegetable oil

1/3 cup of Nutella

Grease a glass 9x13 pan; heat oven to 350 degrees.
Mix all above ingredients together in a large bowl with beaters until well combined. 
Empty contents of bowl into your greased pan. 

Measure Nutella into a small bowl. Heat in microwave for about 10-15 seconds on half-power (no higher than level 5). Stir and then drop into small spoonfuls around the top of the brownie mixture. 
Using a knife or spatula, swirl Nutella through brownies by doing a zig-zag pattern with the tip of the spatula the whole length of the pan. 

Bake for abut 25 minutes in the oven. Brownies should be a bit firm to the touch but still quite moist when you take them out of the oven. Leave in the pan to cool.

Cut into desired size & serve warm. Or store in an air-tight container for up to 3 days. 

Thursday, August 9, 2012

I did it all for the Gnocchi

Ha.. get it? Any children of the 90s out there? Hello? 

Gnocchi. Probably one of my all-time favorite Italian foods. I am happy with the packaged ones from Trader Joe's but I am even more happy with fresh, homemade gnocchi. I have made them before with minor success. They were eatable but really sticky and difficult to work with. I came across a different recipe, tried it a few times, and am convinced these are the best. They are pretty easy - but definitely a time commitment. But, my friends, SO worth it! 

This could be your dinner!

 To make a full-batch you start with just 2 basic Russet potatoes. I like to bake mine versus microwaving them. I think it gives a better texture and flavor. Not sure why but I think it does.


 Peel and cut the potatoes up into quarters and push them through a ricer. If you don't have a ricer.. go get one. Ikea has them for like $9. But if you really don't want to make that type of commitment, you can use a cheese grater or potato masher as well - it's just a bit harder to get all the clumps out with a masher and you really don't want too many lumps in your gnocchi. I've done it both ways... go with the ricer!


In a separate bowl, mix together the egg & salt. 

I am making just plain gnocchi here but if you wanted to add a bit of flare, at this point you could also toss in some dried herbs, pepper, a bit of Parmesan cheese. But today we stay purist.


Mix everything together well.


Add in your flour and mix until it comes together enough to dump it out on a hard surface to knead. Flour a hard surface (counter, cutting board, etc) and turn out your dough. You will want to knead your dough, adding flour as necessary as you go, until it is not sticky - aka does not stick to your surface or your hands. Add flour in small amounts until it reaches this point. Remember, it is always easier to add flour than try to take it out. (I'm pretty sure it's impossible to take it out.)

Once your dough is ready, place it back in your bowl & keep any un-used portion covered by a damp paper towel. This will help it from drying out. 

Portion your dough into roughly baseball-sized pieces. Using one at a time, roll each dough ball into a long snake (or "rope" for our reptile-phobic friend) that is roughly 3/4" thick.


 Once your snake/rope is rolled out evenly, take a knife and cut into 3/4" pieces. 


 To make the gnocchi the proper shape, take each piece and mold to the back-side of a fork. You don't want to mash it through the tines but you do want it to get slight grooves (they are important!). Try to keep the width of the dough equal to the width of the fork. This will help your gnocchi stay a consistent size.


 Roll your gnocchi off from the bottom to top of fork to create a little taco-shaped dumpling. You should be able to see the little grooves left by the fork. 


Place your gnocchi with seams down onto a parchment-covered cookie sheet. It doesn't hurt to add a bit of flour to the paper either. But don't go overboard - then you get a bit floury, gluey mess. Eww!

I like to let my gnocchi sit for a bit and dry out just a touch - maybe 30-60 minutes tops. It is best if you eat these pretty much right away... but if you don't plan on it, place them in an air-tight container for no more than 12 hours. Stack them with parchment between layers. Don't leave these in your fridge for too long. I did once and they turned into this really goopy mess that turned sort of brown. Just eat them!


So, when you're finally ready to eat these little lovelies, place them in boiling, heavily-salted water. They really only need to cook for about 3-5 minutes. You'll know they're ready when they start to float. Spoon them into a bowl and serve immediately with your favorite sauce. 

And this is what you get for dinner. 
So good.

Cheers to the Cook!


Gnocchi - serves 4
(recipe adapted from Prep Kitchen Essentials)
2 Large Russet Potatoes, 
2 Eggs, beaten
2 tsp Salt
2 cups Flour + more for kneading

1. Bake potatoes in a 350-degree oven until a knife can be inserted with little resistance through the middle of the potatoes, about an hour.
2. Peel potatoes and run through a ricer into a medium mixing bowl.
3. In a small bowl, mix eggs & salt. Add mixture to potatoes & stir with rubber spatula until well incorporated.
4. Sprinkle the flour into the potatoes and fold in using the rubber spatula, forming a dough
5. Dust a work surface and dump potato mixture out. Knead potato mixture adding flour as necessary just until it not sticky to the touch.
6. Split the dough into about 6 baseball-sized portions. Leave unused portions in a bowl covered by a damp paper towel to keep from drying out. 
7. Working with one portion at a time, roll the dough into a long rope about 3/4" thick. Cut gnocchi about 3/4" long.
8. Press the gnocchi into the back of a fork with your thumb, using the tines to leave vertical grooves . Roll gnocchi off fork into U-shape. Set on a parchment-covered sheet, seams down
9. Let gnocchi sit for about 30 minutes. Proceed to cooking or cover and refrigerate for up to 12 hours. 
10. To cook, bring a large pot of heavily-salted water to boil. Boil the gnocchi until it floats - about 5 minutes. Remove gnocchi with a strainer. Add sauce of your choice and enjoy!

Tuesday, July 31, 2012

Triple-Chocolate Scones

A wonderful friend sent me a big box of all sorts of fun baking spices from Penzey's a while back and I've been trying to use them to make some new, fun things. 

Some of the items in the box are normal - vanilla beans, cocoa powder, poppy seeds... but then there are a few I've never played with - double-vanilla extract, 3 different kinds of ground cinnamon, cardamom (umm.. this makes chai spice... it is amazing!). 

I have a great base recipe for scones that I adore and always gets me many compliments so I decided to break into the box and use something new to make up some scones for a treat - I chose Natural High-Fat Cocoa. Go big, or go home.. right?!
My scone recipe starts with sour cream with a bit of baking soda mixed in. 
 This is the sour cream right after I mixed in the baking soda - you can already see it getting fluffy.
 And this is after about 10 minutes. It almost doubles in size! The sour cream becomes unbelievably fluffy and airy. I like to think of it as a cool baking-science experiment.
 See all this butter... it goes into these scones. Yeeuummm.
I decided to chop up block chocolate to mix into the scones.
The chopped-up chocolate melts right into the scones and makes them super moist and chocolaty.  
 Once all the dry ingredients are mixed up, cut in the butter with a pastry cutter. 
 Pat the dough out to be about 3/4"thick; add more chocolate to the top before cutting into triangles

 Cut into triangles, put on a parchment-lined cookie sheet to bake.

Eat your scones with your favorite coffee beverage - that's the best way!

Cheers to the cook!


Triple-Chocolate Scones 

(adapted from allrecipes.com)


Ingredients

  • 1 cup sour cream
  • 1 teaspoon baking soda
  • 3 1/2 cups all-purpose flour
  • 1/2 cup cocoa powder
  • 1 cup white sugar
  • 2 teaspoons baking powder
  • 1/4 teaspoon cream of tartar
  • 1 teaspoon salt
  • 1 cup butter
  • 1 egg
  • 1 cup milk chocolate, roughly chopped
  • 1 cup mini chocolate chips (milk or semi-sweet)

Directions

  1. In a small bowl, blend the sour cream and baking soda, and set aside.
  2. Preheat oven to 350 degrees F (175 degrees C). Cover a two baking sheets with parchment paper.
  3. In a large bowl, mix the flour, cocoa, sugar, baking powder, cream of tartar, and salt. Cut in the butter. Stir the sour cream mixture and egg into the flour mixture until just moistened. Mix in the chocolate.
  4. Turn dough out onto a lightly floured surface, and knead briefly. Roll or pat dough into a 3/4 inch thick rectangle. Cut into wedges, and place them 2 inches apart on the prepared baking sheets.
  5. Bake 12 to 15 minutes in the preheated oven, until golden brown on the bottom. Do not over bake.
  6. Cool on baking rack


Sunday, July 29, 2012

Is that Pesto in your Pasta...?

I think I mentioned once before that we have a crop of basil that would make any Italian proud. It is enormous, fragrant and beautiful. 

Growing up my mom always had home-made pesto in the freezer and she would add it to dishes all the time. It was so good and always tasted so fresh. I am fairly confident that you can always tell the difference between home-made pesto and anything from a jar. Just saying.

The good and easy thing about making your own pesto is that a lot of the recipe is up to you and your taste buds. So I say, start small and taste-add as you go. 

My fresh basil cut right off the enormous "tree"

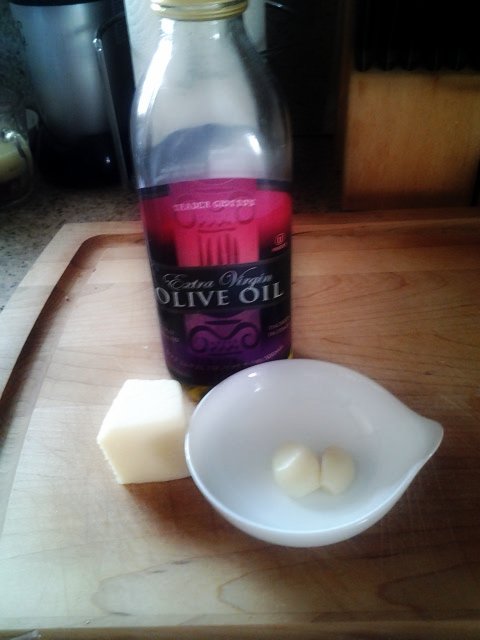
The basic accouterments: olive oil, garlic & Parmesan cheese

The finished product

Dinner: linguine with pesto, fresh tomatoes (also from our garden), some spicy chicken sausage with a bit more Parmesan cheese sprinkled on top for good measure. So good. 

Cheers to the Cook!


Home-made Pesto 
Special Equipment: Mini Food Processor, Magic Bullet or any other type of small blending-chopping apparatus

1 cup basil leaves, rinsed & dried
2 cloves of garlic (or more to taste)
2 tbsp Parmesan cheese (you could also use asiago or reggiano... almost any hard Italian cheese)
1/4-1/2 tsp salt (or more to taste - I like to make the pesto itself a bit less salty - you can always add more once it is worked into a recipe)
1/4 cup olive oil (again, start here, add more as necessary. Some like a thinner consistency, so add to your liking)

Throw all ingredients in your processor, puree/blend/chop for about 30 seconds. Scrape down sides, add a bit more oil if consistency is not right. Blend for another 10-15 seconds. Enjoy with ANYTHING!

Yield: 2 servings


Monday, July 16, 2012

Sunday Morning Apple Cake

I walked into my kitchen one morning and discovered I had a bunch of apples in my fruit bowl that were looking sad. Seeing as it is not apple season right now (see: July, humid, hot) I was not at all surprised that these apples had decided it was their time to start heading towards the light. 

Wait! I can make you into something delicious! Apple Cake!!
  I dug out my apple peeler-corer-sliced that I inherited from my grandmother. If you do not have one of these... get one. Seriously. It is worth its weight in gold. Peeling and slicing up apples was one of my least favorite things to do and this made it all better. It literally does just what it says - it peels, slices & cores an apple all at one time. It's just magic.
 Before
 After
 See how amazing it is?! Anyway - I got side-tracked... we're making Apple Cake. Two apples, peeled, sliced, cored and then slice in half. I usually cut the core out completely to avoid any rough spots. I  basically take the half apple and cut down on either side of the core, then once behind the core and call it a day. 
 I decided our apple bread needed some toasted walnuts. Easiest way is to just toss the walnut pieces into a dry frying pan over medium-high heat until they become fragrant - just a few minutes. 
 In a bowl I tossed together my sliced-up apples, some golden raisins & my toasted (and then roughly-chopped) walnut pieces. 
 In a separate bowl I mixed together the dry ingredients, then added the wet to make this mixture. Be aware, it's not a batter - it's more of a crumbly mixture. 

Once it's all mixed together - add the apple-raisin-walnut mix - mix it up well and pour it all into a greased bread pan. I think the recipe I was reading asked for an 8x4 pan... I actually have no idea what the dimensions of my loaf pans are.. I just guess. That's what separates me from the novice bakers - my ability to adapt pan sizes. Ha!
And this gloriousness is your end result. The texture of this is less bread-y and a bit more cake-y. I suppose you're supposed to wait until it cools to slice into it and eat it but that was not happening on this particular morning. I'm pretty sure while the oven mitts were still on we demolished about 1/2 the cake for breakfast. I couldn't even get a better picture than this. 

This is actually really good for breakfast - or if you can wait for dessert, this would be super amazing with some vanilla ice cream. Yum. 

Cheers to the cook!


Apple Cake - adapted from All Recipes

Ingredients

  • 1 cup all-purpose flour
  • 1 teaspoon baking soda
  • 1 teaspoon ground cinnamon
  • 1/2 teaspoon salt
  • 1 cup white sugar
  • 1 egg
  • 1/4 cup vegetable oil
  • 2 apples - peeled, cored, and chopped
  • 1/2 cup chopped walnuts
  • 1/2 cup golden raisins 

Directions

  1. Preheat oven to 350 degrees F (175 degrees C). Grease and flour an 8x4 inch loaf pan (or whatever you have.. don't get stuck on the logistics - just remember to alter your baking time a bit if you use a different sized pan). 
  2. Sift together the flour, baking soda, cinnamon and salt. Set aside.
  3. In a medium bowl, mix together the sugar, egg and oil. stir in the sifted ingredients. 
  4. Fold in the apples, nuts and raisins.
  5. Bake for 55 to 60 minutes in the preheated oven, or until a toothpick inserted into the cake comes out clean.

Sunday, July 15, 2012

From our Garden: Tomatoes

After we re-did our backyard last summer, my husband made us three great raised beds for planting our own herbs, veggies, fruits... and, still, the occasional weed. (grr!)

Our first official crop is basil, followed closely by tomatoes. Both are plentiful and beyond delicious. So, over the weekend we decided to start harvesting our ripe fruits and enjoy them during their perfection.


Our first harvest - 9 tomatoes. Hmm... what goes well with tomatoes? Basil! (umm.. I don't have a picture of our basil but trust me - it's amazing)

We decided on some bruschetta - chopped up a couple of tomatoes, added some minced garlic, chopped basil, a bit of olive oil & salt & let it marinate for about 30 minutes. There is something about fresh, organic produce - the flavors are so much stronger and better than anything you could buy in the grocery store. After I mixed all of the ingredients together you could just smell the goodness wafting out of the kitchen. So good.


 To go with our bruschetta I whipped up a batch (actually, a half-batch) of pizza dough from my Williams-Sonoma cookbook. I grew up on home-made pizza dough and love it so it was worth the extra effort. And toasts are not good enough for our home-made bruschetta!


To make it an official meal we served our bruschetta with some cheese, salami and two kinds of olives. 


Here's our final product - amazing, fresh and packed full of flavor. And... maybe even slightly healthy. Ok, let's go with healthier... than a lot of things we could have had for dinner. 

Cheers to the cook!


Bruschetta Bread (adapted from Williams-Sonoma's Pizza Dough)

Ingredients:

  • 1 Tbs. active dry yeast
  • 3/4 cup plus 2 Tbs. lukewarm water
  • 2 3/4 cups all-purpose flour, plus 1/2 cup for
      working
  • 1 tsp. salt
  • 1 Tbs. extra-virgin olive oil

Directions:

Turn oven on to 500 degrees. Place pizza stone in oven while it preheats.
In a small bowl, dissolve the yeast in the lukewarm water and let stand until slightly foamy, about 10 minutes.
In a large bowl, stir together the 2 3/4 cups flour and the salt and form into a mound. Make a well in the center and add the yeast mixture to the well. Using a fork and stirring in a circular motion, gradually pull the flour into the yeast mixture. Continue stirring until a dough forms.

Lightly flour a work surface with some of the 1/2 cup flour and transfer the dough to it. Using the heel of your hand, knead the dough until it is smooth and elastic, about 10 minutes. You will most likely need to add more flour as you knead; you do not want your dough to be sticky. Form the kneaded dough into a ball.

Brush a large bowl with the olive oil and place the dough in it. Cover with plastic wrap (or light-weight towel) and let rise at room temperature until doubled in size, about 1 hour. More if you have it

Turn the dough out onto a surface dusted with some flour. Punch down the dough and, using your hand, begin to press it out gently into the desired shape. Stretch the dough until it is the desired thickness, about 1/4 inch thick for a crusty pizza base and 1/2 inch thick for a softer one. Flip the dough over from time to time as your work with it. (Or roll out the dough with a rolling pin.) The dough should be slightly thinner in the middle than at the edge. Lift or pinch the edge of the pizza to form a slight rim.

Take pizza stone from oven & transfer the dough to the stone. Gently spread dough onto the stone. Brush with olive oil & add minced garlic, salt, herbs.. whatever you like. Bake for 10-12 minutes. Let cool for just a few minutes - cut into squares and serve.

Monday, July 9, 2012

Pretty Motivation

My birthday is not for three more months but my mother-in-law said she saw these and thought they would be perfect for my blog. *gulp*

You mean that blog that I abandoned for 6 weeks? 

Yep - that's the one. 
She said she thought these would photograph nicely.

Should we take a sneak peek?

 Well... it's from one of my all-time favorite stores
It is wrapped up in a little paper cocoon. 
I love all the details: the letter pressed box, the personalized masking tape, the muslin bag for the gift receipt. Swoon...
And what do we have? 
The most beautiful measuring cups that anyone could ever own. 

It makes me want to start baking pretty things. Don't you just have the urge for pie? Or a a multi-tiered chantilly cake? 

I do. 

So I'm back. 
I have to put these pretty, little things to work.